
Tutorials · Nail Tutorials
Velvet cat-eye nails: the magnet technique, step by step
Editorial notice: This is an educational guide, not a product recommendation. PowderedPurple is not currently affiliated with any brand or retailer mentioned, no links here are affiliate links, and PowderedPurple does not earn commission from them.
Video version availableThe filmed tutorial is available in the video library with captions and an opening AI-assisted educational-media notice. The written guide remains available for readers who prefer text.
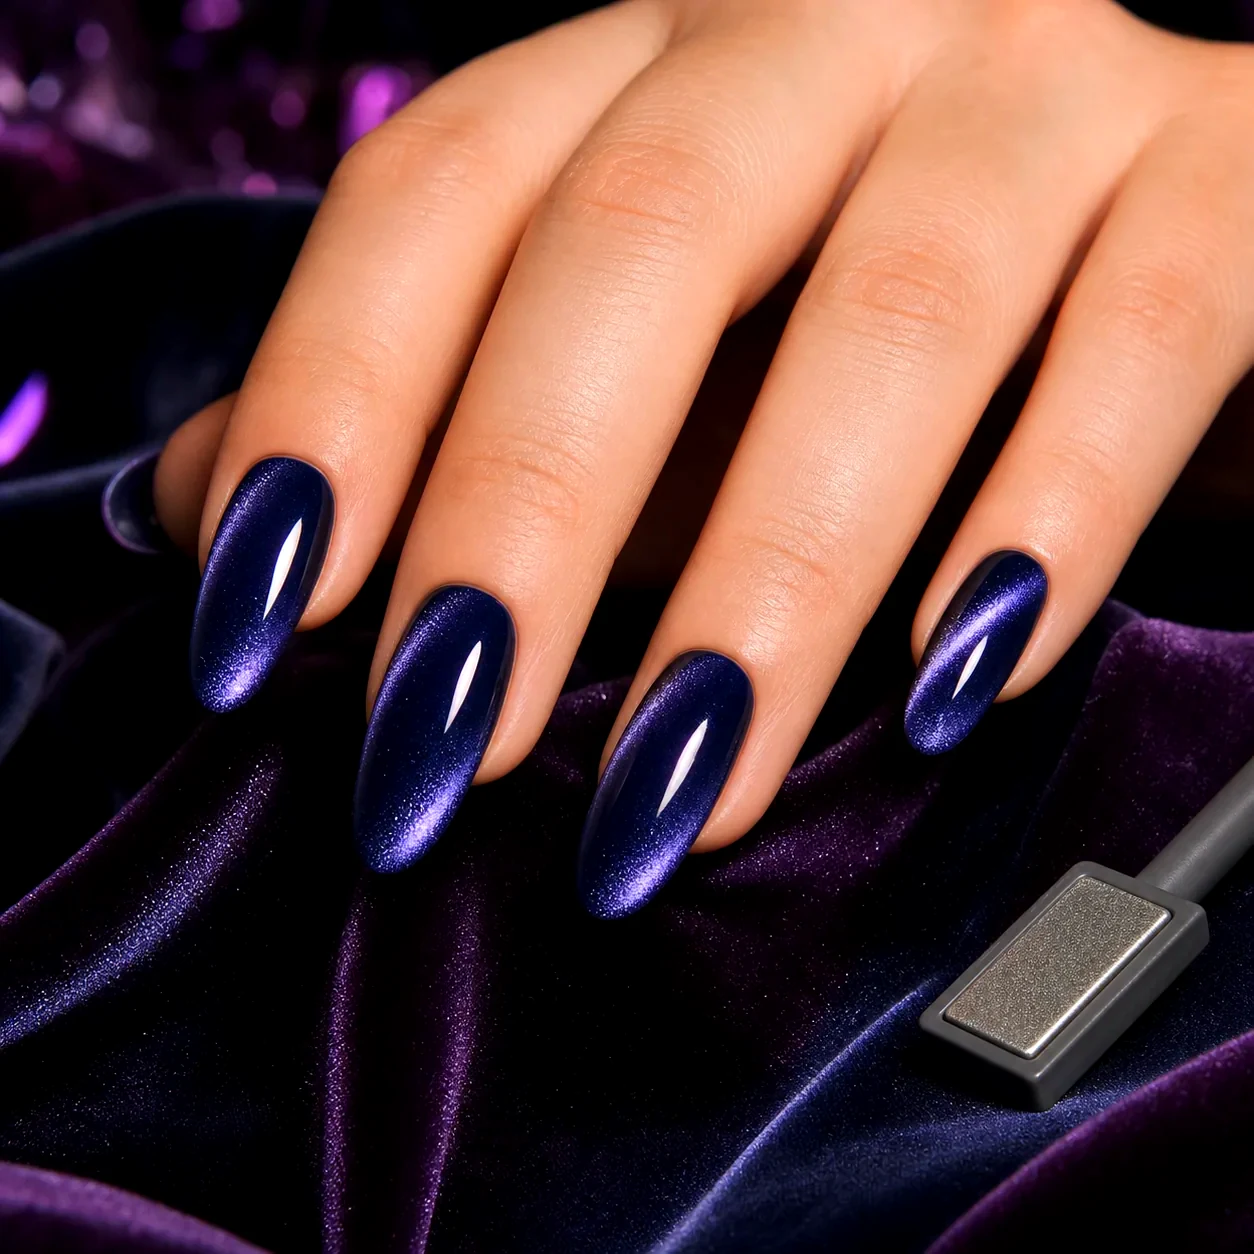
Velvet cat-eye is not a new product. It is the same magnetic gel polish as a classic cat-eye — the difference is entirely in how you hold the magnet. Instead of drawing the shimmer into one sharp line, you spread it across the whole nail for a soft, brushed-velvet glow.
What you need
- Magnetic gel polish (the shimmer particles are what respond to the magnet)
- A magnet — usually supplied with the polish; a bar magnet gives the most even spread
- Base coat, top coat and a curing lamp matched to your gel
- Cleanser for the tacky layer, plus a file and buffer
The steps
- Prep. Push back cuticles, lightly buff the nail plate to remove shine, and wipe with cleanser. Gel lifts from an oily nail.
- Base coat, cure. Thin layer, cure fully per your lamp.
- First colour coat, cure. Keep it thin. Thick coats cure unevenly and wrinkle.
- Second colour coat — do not cure yet. This is the working layer.
- Magnet, one nail at a time. Hold it flat and parallel about 3–5 mm above the nail, and move it slowly across the whole surface for 5–10 seconds. Parallel and moving is what creates velvet; angled and still is what creates a sharp line.
- Cure immediately. The effect starts relaxing the moment the magnet leaves. Cure that nail before moving to the next.
- Top coat, cure, wipe. Remove the tacky inhibition layer with cleanser.
Why yours looks like a line instead of velvet
- Magnet held at an angle — concentrates shimmer into a band. Keep it flat.
- Magnet held still — velvet needs movement across the whole nail.
- Cured too late — the pattern dissipates within seconds.
- Colour coat too thin — not enough shimmer particles to move.
- Magnet too far away — a few millimetres is the working range.
Removal — the step that protects your nails
Nearly all damage from home gels comes from removal, not application. Never pick or peel: that takes layers of nail plate with it.
- File off the top coat until the surface is matte.
- Soak cotton in acetone, hold against the nail with foil or a clip for 10–15 minutes.
- Gently push off the softened gel. If it resists, re-soak rather than force it.
- Buff lightly, then apply cuticle oil.
Two safety points
- Keep uncured gel off skin. Repeated skin contact with uncured acrylates is a common cause of contact allergy, and sensitisation can be lasting. If you flood the cuticle, wipe it before curing.
- Ventilate, and if you prefer, use sunscreen or fingerless UV gloves during curing. Whether you consider that necessary is a personal call — it is worth knowing the option exists.
Related reading: what to look for in a gel nail kit.
Editorial status
- Author
- PowderedPurple Editorial Team
- Last reviewed
- Next scheduled review
- Monetisation
- Editorial only — no affiliate relationship exists for this guide.
- Corrections
- info@powderedpurple.com